1")
[Get the best value jewelry making charm bracelet on Amazon today!]
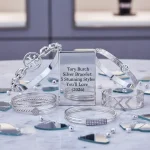
# Charm Bracelet Making: A Beginner’s Guide to Jewelry Design (2026)
So, you’re ready to dive into the wonderful world of jewelry making, specifically charm bracelets? Fantastic! Creating your own charm bracelet is a super fun and rewarding hobby. Not only do you get to express your unique style, but you also end up with a beautiful piece of jewelry that tells your story. This beginner’s guide to jewelry making charm bracelet creation will walk you through everything you need to know to get started, from choosing your materials to designing your masterpiece. Let’s get started on your jewelry making charm bracelet journey!
[Browse top-rated jewelry making charm bracelet on Amazon]
## Why Charm Bracelets are More Than Just Jewelry
Before we jump into the how-to, let’s talk about why charm bracelets are so special. They’re not just pretty accessories; they’re personal narratives you wear on your wrist. Each charm represents a memory, a passion, or a milestone in your life. Whether it’s a tiny Eiffel Tower reminding you of your Parisian adventure, a paw print symbolizing your beloved pet, or a graduation cap celebrating your academic achievement, every charm has a story to tell.
Creating a charm bracelet is like curating a collection of your favorite things. It’s a tangible representation of your personality and experiences, making it a cherished keepsake. Plus, it’s a fantastic way to unleash your creativity and design something truly unique. And, in 2026, with personalized items becoming increasingly popular, a handmade charm bracelet is the perfect way to stand out from the crowd.
[Browse top-rated jewelry making charm bracelet on Amazon]
## Step-by-Step Guide to Making Your First Charm Bracelet
Here’s a detailed, step-by-step guide to crafting your first charm bracelet. We’ll cover everything from gathering your supplies to adding the finishing touches.
### Step 1: Gather Your Supplies
The first step is to gather all the necessary supplies. Here’s a list of what you’ll need:
* **Bracelet Base:** You’ll need a bracelet base to attach your charms to. Options include:
* **Chain Bracelet:** A classic choice, offering flexibility in charm placement.
* **Bangle Bracelet:** A more rigid option, providing a structured look.
* **Wire Bracelet:** A flexible wire that can be shaped and customized.
* **Charms:** The heart of your charm bracelet! Choose charms that reflect your interests and personality. You can find charms in various materials, including:
* **Metal Charms:** Durable and available in a wide range of designs.
* **Glass Charms:** Add a touch of elegance and sparkle.
* **Enamel Charms:** Colorful and playful.
* **Beaded Charms:** Add texture and visual interest.
* **Jump Rings:** Small metal rings used to attach charms to the bracelet base.
* **Jewelry Pliers:** Essential for opening and closing jump rings. You’ll need two pairs:
* **Chain-Nose Pliers:** For precise handling.
* **Round-Nose Pliers:** For shaping wire and jump rings.
* **Clasp (if needed):** If your bracelet base doesn’t have a built-in clasp, you’ll need one to secure it around your wrist.
* **Beads (optional):** Beads can be used to add extra flair and fill gaps between charms.
* **Work Surface:** A clean, flat surface to work on.
### Step 2: Plan Your Design
Before you start attaching charms, take some time to plan your design. Lay out your bracelet base and charms on your work surface and experiment with different arrangements. Consider the following:
* **Theme:** Do you want your charm bracelet to have a specific theme (e.g., travel, nature, hobbies)?
* **Color Palette:** Choose a color palette that complements your style.
* **Spacing:** Leave enough space between charms so they don’t look overcrowded.
* **Balance:** Distribute the charms evenly around the bracelet for a balanced look.
This step is crucial for visualizing the final product and making adjustments before you start the actual assembly.
### Step 3: Attach the Charms
Now it’s time to attach the charms to the bracelet base using jump rings. Here’s how:
1. **Open the Jump Ring:** Use your jewelry pliers to gently open a jump ring. Grip the jump ring on either side of the opening and twist in opposite directions. *Never* pull the jump ring open, as this can distort its shape.
2. **Attach the Charm:** Thread the open jump ring through the loop on the charm.
3. **Attach to the Bracelet Base:** Thread the jump ring through a link on the chain bracelet or around the bangle/wire bracelet.
4. **Close the Jump Ring:** Use your pliers to gently close the jump ring, ensuring the ends meet perfectly.
Repeat this process for each charm, following your planned design.
### Step 4: Add Beads (Optional)
If you’re using beads, now is the time to add them. Thread the beads onto the bracelet base between the charms to add extra color, texture, and visual interest. You can use different sizes and shapes of beads to create a unique look.
### Step 5: Secure the Clasp (if needed)
If your bracelet base doesn’t have a built-in clasp, you’ll need to attach one using jump rings. Open a jump ring, thread it through the loop on one end of the bracelet base, and attach it to one side of the clasp. Repeat this process for the other end of the bracelet base and the other side of the clasp.
### Step 6: Final Touches
Once all the charms, beads, and clasp (if needed) are attached, give your charm bracelet a final inspection. Make sure all the jump rings are securely closed and that the charms are evenly spaced. If needed, make any adjustments to the placement of the charms or beads.
[Browse top-rated jewelry making charm bracelet on Amazon]
## Tools for the Job: Making Jewelry Making Charm Bracelet Crafting Easier
While you can certainly make a charm bracelet with basic tools, having the right equipment can make the process much easier and more enjoyable. Here are a couple of recommended products that can enhance your jewelry-making experience:
### Beadsmith Jewelry Pliers Set
This set includes three essential pliers: chain-nose pliers, round-nose pliers, and cutting pliers. The ergonomic handles provide a comfortable grip, and the high-quality construction ensures durability. These pliers are perfect for opening and closing jump rings, shaping wire, and making precise cuts. Having a reliable set of pliers is crucial for jewelry making charm bracelet projects.
**Key Features:**
* Ergonomic handles for comfortable grip
* High-quality construction for durability
* Includes chain-nose, round-nose, and cutting pliers
**Why We Like It:**
This set provides all the essential pliers you need for jewelry making in one convenient package. The comfortable handles and durable construction make it a pleasure to use, even for extended periods.
### EuroTool Jump Ring Opener/Closer Tool
Opening and closing jump rings can be a fiddly process, especially for beginners. This tool simplifies the task by providing a secure grip on the jump ring, allowing you to open and close it with ease. It’s a great time-saver and helps prevent damage to the jump rings. This tool is particularly useful for jewelry making charm bracelet projects that involve a lot of charms.
**Key Features:**
* Secure grip on jump rings
* Easy to use
* Prevents damage to jump rings
**Why We Like It:**
This tool makes opening and closing jump rings a breeze, saving you time and frustration. It’s a must-have for any serious jewelry maker.
[Browse top-rated jewelry making charm bracelet on Amazon]
## Pro-Tips / FAQ Section
Here are some pro-tips and answers to frequently asked questions to help you create stunning charm bracelets:
* **Pro-Tip #1: Use Quality Materials:** Investing in high-quality bracelet bases, charms, and jump rings will ensure that your charm bracelet lasts for years to come.
* **Pro-Tip #2: Experiment with Different Charm Sizes and Shapes:** Don’t be afraid to mix and match different charm sizes and shapes to create a visually interesting design.
* **Pro-Tip #3: Add Personal Touches:** Consider adding personalized charms, such as engraved initials or birthstones, to make your charm bracelet even more special.
* **FAQ #1: How do I clean my charm bracelet?** Use a soft cloth and mild soap to gently clean your charm bracelet. Avoid using harsh chemicals or abrasive cleaners, as these can damage the charms.
* **FAQ #2: How do I prevent my charm bracelet from tarnishing?** Store your charm bracelet in a dry, airtight container when you’re not wearing it. You can also use anti-tarnish strips to help prevent tarnishing.
* **FAQ #3: Can I add charms to my charm bracelet later?** Absolutely! One of the great things about charm bracelets is that you can continue to add charms as you collect new memories and experiences.
[Browse top-rated jewelry making charm bracelet on Amazon]
## Encouraging Conclusion
Congratulations! You’ve completed your first charm bracelet. Now you have a beautiful and personalized piece of jewelry that tells your story. Remember, jewelry making charm bracelet crafting is all about expressing your creativity and having fun. Don’t be afraid to experiment with different designs, materials, and techniques. The possibilities are endless! So, go ahead and create more charm bracelets for yourself, for your friends, and for your family. Happy crafting!
[Check the latest prices and deals for jewelry making charm bracelet on Amazon today!]